Infrastructure as Code approach, a real life example OCP with Vagrant

As is well known, the Infrastructure as Code approach is nowadays the trendy topic of IT industry in almost all tech companies, it has been for years on startups, and after passed the quality tests is becoming a reality on bigger and older companies, even on the pretty old and very conservative institutions such as banks.

Well, to be honest, my first impression of all the Kubernetes stuff it was little bit stressful, I started with Rancher 1.6 and that solution uses Cattle, its own orchestrator solution, but the important think it's that with Cattle, every old school sysadmin feels like home, because that console is just like seeing a control panel of a data center, in fact it looks and feels just like a f..ng data center on your own laptop, but instead of powerful and big server nodes, there are some little containers running on it.

But, what the heck is a container?

Good question, in short words, a container is a set of one or more processes that are isolated from the rest of the system (Red Hat, 2018). That's it.

You should not to see a container as a virtual machine because a container is pretty different, moreover, you can create containers inside virtual machines, and this post will provide you a proof of what I'm saying.

There is a very good explanation from Red Hat here.

Docker is the most common container product, however, there are more containers solutions, such as cri-o, podman, rocket, and so on.

OpenShift Container Platform (OCP) a Kubernetes based Platform as a Service (PaaS) solution

Well, Kubernetes is a solution to handle containerized systems with a complete integration, from networking to storage and security stuff.

Let me share with you a very good introduction video of what Kubernetes is:

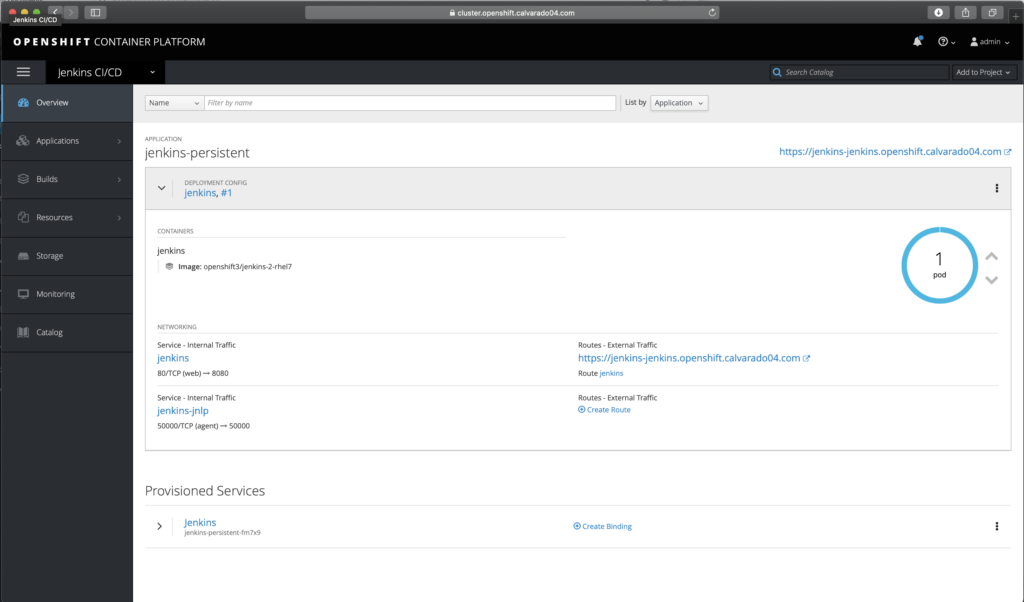
OpenShift is the Red Hat PaaS product based on Kubernetes to provide a full and reliable infrastructure for containers solution.

Enough from introductions, let's get started

Vagrant is an Infrastructure as Code solution from HashiCorp, it provides some tools to deploy your virtual infrastructure by defining a Vagrantfile, it deploys the virtual machines with their configurations, networking, subscriptions and the product also includes a repository of VirtualBox images that you can use on your projects.

This project is using Vagrant and is deploying some VirtualBox Virtual Machines, so, your local host machine should have at least 16GB of RAM memory and enough free storage (like 60GB) to deploy the three nodes of this cluster.

So, the prerequisites are:

  • Laptop with Linux (Fedora, Debian, Ubuntu) with 16 GB of RAM and at least 60 GB of free space or a Mac with similar capabilities
  • Vagrant already installed
  • VirtualBox with tools
  • Red Hat Subscription to OCP 3.9, Ansible 2.4, RHEL 7 and RHEL extras repos enabled. (sorry guys, I can not share with you my own subscription)
  • Internet domain with DNS administration, for instance, Namecheap.
  • SSL certificates with wildcards enabled of your internet domain, if you want valid SSL certificates.

You can use my domain if you want, the only thing that will be that the SSL certificates will be self signed on your cluster and you should to be adding the exceptions on your web browser.

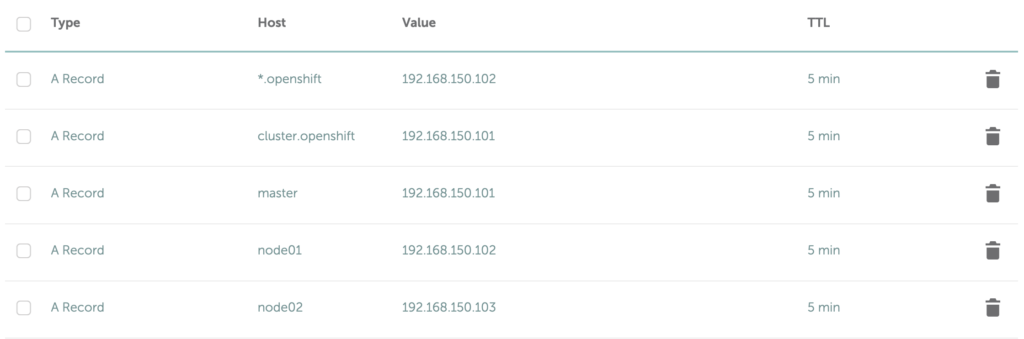
Configure your DNS like the following example, adding some A Records:

  • 192.168.150.101 is the master node, also the public name of the cluster (cluster.openshift) is making reference to this node.
  • 192.168.150.102 is the node01 the infrastructure node, in that node it will by deployed the router pod, that's why the wildcard domain *.openshift is configured to reach that node.
  • 192.168.150.103 is the compute node, node02.

As you can see, we are using the capabilities of DNS A records but we are making reference to local IP's so, all these addresses will not be making sense for external attackers.

Vagrant plugins

vagrant plugin install vagrant-hostmanager

vagrant plugin install vagrant-scp

The only thing that you should perform after having all these prerequisites. would be:

./oc-up.sh

And wait for a while

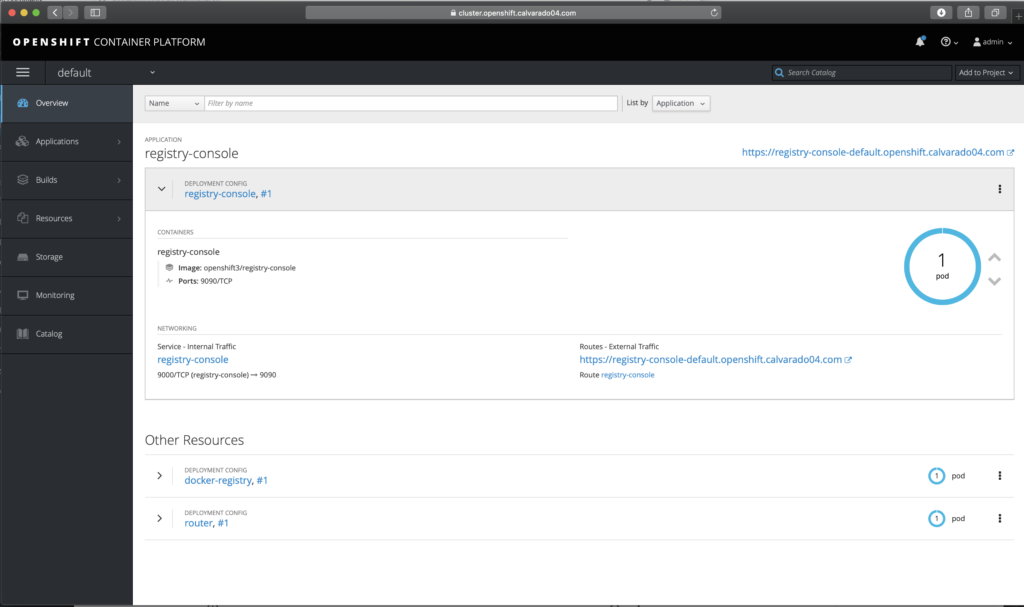
After that, you can navigate to your new cluster.

https://cluster.openshift.calvarado04.com

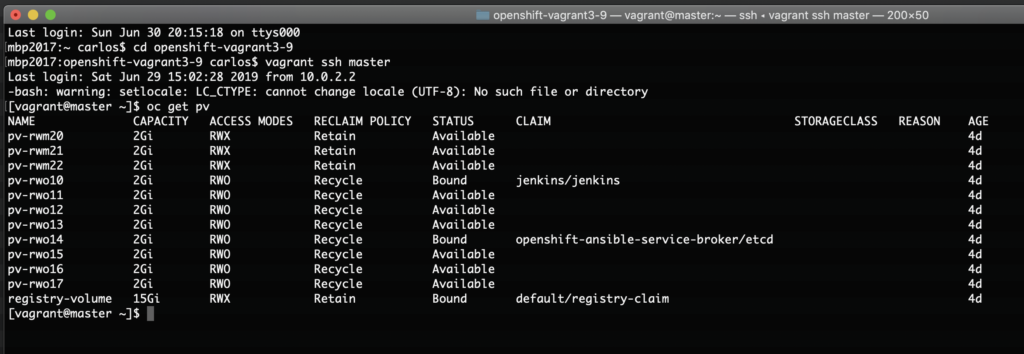
This cluster is including some NFS Persistent Volumes to be able to create a project with persistent storage out of the box.

Obviously, you should to replace my calvarado04.com domain with your own domain.

The default user is admin and the password is handhand.

Why OpenShift 3.9.78?

Just because is the official version for the Red Hat Certified Specialist in OpenShift Administration (EX280) certification.

The scripts

If you will be using your own domain, just replace any calvarado04.com with your domain on the following scripts.

Create a directory like openshift-vagrant3-9 and in there place the following scripts:

Vagrantfile

OPENSHIFT_RELEASE = "3.9"
OPENSHIFT_ANSIBLE_BRANCH = "release-#{OPENSHIFT_RELEASE}"
NETWORK_BASE = "192.168.150"
INTEGRATION_START_SEGMENT = 101

# All Vagrant configuration is done below. The "2" in Vagrant.configure
# configures the configuration version (we support older styles for
# backwards compatibility). Please don't change it unless you know what
# you're doing.

$script = %{
if ! subscription-manager status; then
  sudo subscription-manager register --username=youraccount  --password=yourpassword
  sudo subscription-manager attach --pool=yourpool
  sudo subscription-manager repos --enable=rhel-7-server-extras-rpms
  sudo subscription-manager repos --enable=rhel-7-server-ansible-2.4-rpms 
  sudo subscription-manager repos --enable=rhel-7-server-ose-3.9-rpms
  sudo subscription-manager repos --enable=rhel-7-server-rpms
  sudo subscription-manager repos --enable=rhel-7-fast-datapath-rpms
  sudo rm -rf /etc/yum.repos.d/epel.repo
  sudo rm -rf /etc/yum.repos.d/epel-testing.repo 
  sudo yum install -y docker
  sudo systemctl enable docker
  sudo systemctl start docker
  sudo setsebool -P virt_sandbox_use_fusefs on
  sudo setsebool -P virt_use_fusefs on
fi
}

Vagrant.configure("2") do |config|
  # The most common configuration options are documented and commented below.
  # For a complete reference, please see the online documentation at
  # https://docs.vagrantup.com.

  # Every Vagrant development environment requires a box. You can search for
  # boxes at https://vagrantcloud.com/search.
  config.vm.box = "generic/rhel7"
  config.vm.box_check_update = true
  config.vm.provision "shell", inline: $script

#  if Vagrant.has_plugin?('landrush')
#    config.landrush.enabled = true
#    config.landrush.tld = 'calvarado04.com'
#    config.landrush.guest_redirect_dns = false
#  end

  config.hostmanager.enabled = true
  config.hostmanager.manage_host = true
  config.hostmanager.ignore_private_ip = false


  config.vm.provider "virtualbox" do |vb|
    vb.memory = "3072"
    vb.cpus   = "2"
  end

  # Define nodes
  (1..2).each do |i|
    config.vm.define "node0#{i}" do |node|
      node.vm.network "private_network", ip: "#{NETWORK_BASE}.#{INTEGRATION_START_SEGMENT + i}"
      node.vm.hostname = "node0#{i}.calvarado04.com"

      if "#{i}" == "1"
        node.hostmanager.aliases = %w(lb.calvarado04.com)
      end
    end
  end

  # Define master
  config.vm.define "master", primary: true do |node|
    node.vm.network "private_network", ip: "#{NETWORK_BASE}.#{INTEGRATION_START_SEGMENT}"
    node.vm.hostname = "master.calvarado04.com"
    node.hostmanager.aliases = %w(etcd.calvarado04.com nfs.calvarado04.com)
    
    # 
    # Memory of the master node must be allocated at least 2GB in order to
    # prevent kubernetes crashed-down due to 'out of memory' and you'll end
    # up with 
    # "Unable to restart service origin-master: Job for origin-master.service 
    #  failed because a timeout was exceeded. See "systemctl status 
    #  origin-master.service" and "journalctl -xe" for details."
    #
    # See https://github.com/kubernetes/kubernetes/issues/13382#issuecomment-154891888
    # for mor details.
    #
    node.vm.provider "virtualbox" do |vb|
      vb.memory = "3072"
      vb.cpus   = "2"
    end
    

    # Deploy private keys of each node to master
    if File.exist?(".vagrant/machines/master/virtualbox/private_key")
      node.vm.provision "master-key", type: "file", run: "never", source: ".vagrant/machines/master/virtualbox/private_key", destination: "/home/vagrant/.ssh/master.key"
    end

    if File.exist?(".vagrant/machines/node01/virtualbox/private_key")
      node.vm.provision "node01-key", type: "file", run: "never", source: ".vagrant/machines/node01/virtualbox/private_key", destination: "/home/vagrant/.ssh/node01.key"
    end

    if File.exist?(".vagrant/machines/node02/virtualbox/private_key")
      node.vm.provision "node02-key", type: "file", run: "never", source: ".vagrant/machines/node02/virtualbox/private_key", destination: "/home/vagrant/.ssh/node02.key"
    end
  end
end

oc-up.sh

#!/bin/bash
#
# Copyright 2017 Liu Hongyu
#
# Licensed under the Apache License, Version 2.0 (the "License");
# you may not use this file except in compliance with the License.
# You may obtain a copy of the License at
#
#     http://www.apache.org/licenses/LICENSE-2.0
#
# Unless required by applicable law or agreed to in writing, software
# distributed under the License is distributed on an "AS IS" BASIS,
# WITHOUT WARRANTIES OR CONDITIONS OF ANY KIND, either express or implied.
# See the License for the specific language governing permissions and
# limitations under the License.

# resolve links - $0 may be a softlink
PRG="$0"
RETCODE=0

while [ -h "$PRG" ]; do
    ls=`ls -ld "$PRG"`
    link=`expr "$ls" : '.*-> \(.*\)$'`
    if expr "$link" : '/.*' > /dev/null; then
        PRG="$link"
    else
        PRG=`dirname "$PRG"`/"$link"
    fi
done

# Get standard environment variables
PRGDIR=`dirname "$PRG"`

readonly openshift_release=`cat Vagrantfile | grep '^OPENSHIFT_RELEASE' | awk -F'=' '{print $2}' | sed 's/^[[:blank:]\"]*//;s/[[:blank:]\"]*$//'`

. "$PRGDIR/common.sh"

vagrant up

vagrant provision --provision-with master-key,node01-key,node02-key

vagrant scp ansible-hosts master:/home/vagrant/ansible-hosts

vagrant scp master.sh master:/home/vagrant/master.sh 

vagrant scp all.sh master:/home/vagrant/all.sh

vagrant scp common.sh master:/home/vagrant/common.sh

vagrant scp htpasswd master:/home/vagrant/htpasswd

vagrant scp calvarado04_com master:/home/vagrant/

vagrant scp _openshift_calvarado04_com master:/home/vagrant/


vagrant ssh master -c 'sudo mkdir /exports; sudo chmod 777 /exports'
vagrant ssh master -c 'sudo yum install -y nfs-utils rpcbind'
vagrant ssh master -c 'sudo systemctl enable nfs-server'
vagrant ssh master -c 'sudo systemctl enable rpcbind'
vagrant ssh master -c 'sudo systemctl enable nfs-lock'
vagrant ssh master -c 'sudo systemctl enable nfs-idmap'
vagrant ssh master -c 'sudo setsebool -P nfs_export_all_rw on'
vagrant ssh master -c 'sudo setsebool -P virt_sandbox_use_fusefs on'
vagrant ssh master -c 'sudo setsebool -P virt_use_fusefs on'
vagrant ssh master -c 'sudo firewall-cmd --zone=public --add-service=nfs'
vagrant ssh master -c 'sudo firewall-cmd --zone=public --add-service=nfs  --permanent'
vagrant ssh master -c 'echo "/exports *(rw,root_squash,sync,no_wdelay)" > /home/vagrant/exports; sudo mv /home/vagrant/exports /etc/exports'
vagrant ssh master -c 'sudo systemctl start nfs-server'
vagrant ssh master -c 'sudo systemctl start rpcbind'
vagrant ssh master -c 'sudo systemctl start nfs-lock'
vagrant ssh master -c 'sudo systemctl start nfs-idmap'


vagrant ssh node01 -c 'sudo yum install -y nfs-utils rpcbind'
vagrant ssh node01 -c 'sudo setsebool -P nfs_export_all_rw on'
vagrant ssh node01 -c 'sudo setsebool -P virt_sandbox_use_fusefs on'
vagrant ssh node01 -c 'sudo setsebool -P virt_use_fusefs on'
vagrant ssh node01 -c 'sudo mkdir /exports; sudo chmod 777 /exports'
vagrant ssh node01 -c 'sudo mount -t nfs -o rw,sync master.calvarado04.com:/exports /exports'

vagrant ssh node02 -c 'sudo setsebool -P nfs_export_all_rw on'
vagrant ssh node02 -c 'sudo setsebool -P virt_sandbox_use_fusefs on'
vagrant ssh node02 -c 'sudo setsebool -P virt_use_fusefs on'

vagrant ssh master -c 'sudo /bin/bash /home/vagrant/master.sh'

vagrant scp CreatePVs.sh master:/home/vagrant

vagrant ssh master -c 'ansible-playbook /usr/share/ansible/openshift-ansible/playbooks/prerequisites.yml'

if [ $? -eq 0 ]; then 

  vagrant ssh master -c 'ansible-playbook /usr/share/ansible/openshift-ansible/playbooks/deploy_cluster.yml'

  vagrant ssh master -c 'chmod 755 /home/vagrant/CreatePVs.sh; /bin/bash /home/vagrant/CreatePVs.sh'


else

  echo -e "\n The prerequisites has been failed, please check. \n"

fi

htpasswd

admin:$apr1$gfaL16Jf$c.5LAvg3xNDVQTkk6HpGB1

CreatePVs.sh

oc adm policy add-cluster-role-to-user cluster-admin admin

mkdir -p /exports/openshift/pvs/

chmod 777 /exports/openshift/pvs/


mkdir -p /home/vagrant/pvfiles


export volsize="2Gi"

for volume in pv-rwo{10..17} ; do
  mkdir -p /exports/openshift/pvs/${volume}
  chmod 777 /exports/openshift/pvs/${volume}
  cat << EOF > /home/vagrant/pvfiles/${volume}
{
  "apiVersion": "v1",
  "kind": "PersistentVolume",
  "metadata": {
    "name": "${volume}"
  },
  "spec": {
    "capacity": {
        "storage": "${volsize}"
    },
    "accessModes": [ "ReadWriteOnce" ],
    "nfs": {
        "path": "/exports/openshift/pvs/${volume}",
        "server": "master.calvarado04.com"
    },
    "persistentVolumeReclaimPolicy": "Recycle"
  }
}
EOF
  echo "Created def file for ${volume}";
done;


for volume in pv-rwm{20..22} ; do
  mkdir -p /exports/openshift/pvs/${volume}
  chmod 777 /exports/openshift/pvs/${volume}
  cat << EOF > /home/vagrant/pvfiles/${volume}
{
  "apiVersion": "v1",
  "kind": "PersistentVolume",
  "metadata": {
    "name": "${volume}"
  },
  "spec": {
    "capacity": {
        "storage": "${volsize}"
    },
    "accessModes": [ "ReadWriteMany" ],
    "nfs": {
        "path": "/exports/openshift/pvs/${volume}",
        "server": "master.calvarado04.com"
    },
    "persistentVolumeReclaimPolicy": "Retain"
  }
}
EOF
  echo "Created def file for ${volume}";
done;


cat /home/vagrant/pvfiles/* | oc create -f -

common.sh

#!/bin/bash
#
# Copyright 2017 Liu Hongyu
#
# Licensed under the Apache License, Version 2.0 (the "License");
# you may not use this file except in compliance with the License.
# You may obtain a copy of the License at
#
#     http://www.apache.org/licenses/LICENSE-2.0
#
# Unless required by applicable law or agreed to in writing, software
# distributed under the License is distributed on an "AS IS" BASIS,
# WITHOUT WARRANTIES OR CONDITIONS OF ANY KIND, either express or implied.
# See the License for the specific language governing permissions and
# limitations under the License.
#

#===  FUNCTION  ================================================================
#         NAME:  version
#  DESCRIPTION:  Convert a version string to integer
# PARAMETER  1:  Version string
#===============================================================================
function version() {
    echo "$@" | awk -F "." '{ printf("%01d%03d\n", $1, $2); }'
}

master.sh

#!/bin/bash
#
# Copyright 2017 Liu Hongyu
#
# Licensed under the Apache License, Version 2.0 (the "License");
# you may not use this file except in compliance with the License.
# You may obtain a copy of the License at
#
#     http://www.apache.org/licenses/LICENSE-2.0
#
# Unless required by applicable law or agreed to in writing, software
# distributed under the License is distributed on an "AS IS" BASIS,
# WITHOUT WARRANTIES OR CONDITIONS OF ANY KIND, either express or implied.
# See the License for the specific language governing permissions and
# limitations under the License.
#

yum -y install git net-tools bind-utils iptables-services bridge-utils bash-completion kexec-tools sos psacct
      
# Sourcing common functions
. /home/vagrant/common.sh

yum -y install openshift-ansible

mv /home/vagrant/ansible-hosts /etc/ansible/hosts

mkdir -p /home/vagrant/.ssh
bash -c 'echo "Host *" >> /home/vagrant/.ssh/config'
bash -c 'echo "StrictHostKeyChecking no" >> /home/vagrant/.ssh/config'
chmod 600 /home/vagrant/.ssh/config
chown -R vagrant:vagrant /home/vagrant

ansible-hosts

# Create an OSEv3 group that contains the masters and nodes groups
[OSEv3:children]
masters
nodes
etcd
nfs

# Set variables common for all OSEv3 hosts
[OSEv3:vars]
# SSH user, this user should allow ssh based auth without requiring a password
ansible_ssh_user=vagrant

# If ansible_ssh_user is not root, ansible_become must be set to true
ansible_become=true

openshift_deployment_type=openshift-enterprise
openshift_image_tag=v3.9.78
openshift_pkg_version=-3.9.78
openshift_release=3.9.78
openshift_disable_check=disk_availability,docker_storage,memory_availability


osm_cluster_network_cidr=10.1.0.0/16
openshift_portal_net=172.30.0.0/16
hostSubnetLength=9
os_sdn_network_plugin_name='redhat/openshift-ovs-subnet'

openshift_console_install=true
openshift_console_hostname=console.openshift.calvarado04.com
openshift_enable_unsupported_configurations=true

#Add your own Red Hat credentials
oreg_auth_user=youruser
oreg_auth_password=yourpassword

#OCR configuration variables
openshift_hosted_registry_storage_kind=nfs
openshift_hosted_registry_storage_access_modes=['ReadWriteMany']
openshift_hosted_registry_storage_nfs_directory=/exports
openshift_hosted_registry_storage_nfs_options='*(rw,root_squash)'
openshift_hosted_registry_storage_volume_name=registry
#openshift_hosted_registry_selector='node-role.kubernetes.io/infra=true'
openshift_hosted_registry_storage_volume_size=15Gi
openshift_hosted_registry_storage_host=master.calvarado04.com

openshift_examples_modify_imagestreams=true
os_firewall_use_firewalld=True

#Comment this if you don't have your own SSL certificates

#Master/API certificates
openshift_master_overwrite_named_certificates=true

openshift_master_named_certificates=[{'certfile': '/home/vagrant/_openshift_calvarado04_com/_openshift_calvarado04_com.crt', 'keyfile': '/home/vagrant/_openshift_calvarado04_com/_openshift_calvarado04_com.key', 'names':  ['cluster.openshift.calvarado04.com'], 'cafile': '/home/vagrant/_openshift_calvarado04_com/_openshift_calvarado04_com.ca-bundle' }]

#Router certificates
openshift_hosted_router_certificate={'cafile': '/home/vagrant/_openshift_calvarado04_com/_openshift_calvarado04_com.ca-bundle', 'certfile': '/home/vagrant/_openshift_calvarado04_com/_openshift_calvarado04_com.crt', 'keyfile': '/home/vagrant/_openshift_calvarado04_com/_openshift_calvarado04_com.key'} 


#Htpasswd
openshift_master_identity_providers=[{'name': 'htpasswd_auth', 'login': 'true', 'challenge': 'true', 'kind': 'HTPasswdPasswordIdentityProvider', 'filename': '/home/vagrant/htpasswd'}]


openshift_master_htpasswd_file=/home/vagrant/htpasswd
# Default login account: admin / handhand

openshift_disable_check=disk_availability,memory_availability,docker_storage,docker_image_availability
openshift_docker_options=" --selinux-enabled --log-driver=journald --storage-driver=overlay --registry-mirror=http://4a0fee72.m.daocloud.io "

openshift_node_groups=[{'name': 'node-config-master', 'labels': ['node-role.kubernetes.io/master=true','runtime=docker']}, {'name': 'node-config-infra', 'labels': ['node-role.kubernetes.io/infra=true','runtime=docker']}, {'name': 'node-config-infra-compute','labels': ['node-role.kubernetes.io/infra=true','node-role.kubernetes.io/compute=true','runtime=docker']}, {'name': 'node-config-compute', 'labels': ['node-role.kubernetes.io/compute=true','runtime=docker'], 'edits': [{ 'key': 'kubeletArguments.pods-per-core','value': ['20']}]}]

openshift_enable_service_catalog=true
template_service_broker_install=true

openshift_hosted_router_replicas=1

openshift_master_api_port=443
openshift_master_console_port=443
openshift_master_default_subdomain=openshift.calvarado04.com
openshift_master_cluster_public_hostname=cluster.openshift.calvarado04.com
openshift_master_cluster_hostname=master.calvarado04.com


openshift_template_service_broker_namespaces=['openshift']
ansible_service_broker_install=true
openshift_master_dynamic_provisioning_enabled=true

# host group for masters
[masters]
master.calvarado04.com openshift_ip=192.168.150.101 openshift_host=192.168.150.101 ansible_ssh_private_key_file="/home/vagrant/.ssh/master.key"

[etcd]
master.calvarado04.com openshift_ip=192.168.150.101 openshift_host=192.168.150.101 ansible_ssh_private_key_file="/home/vagrant/.ssh/master.key"

[nodes]
master.calvarado04.com openshift_ip=192.168.150.101 openshift_host=192.168.150.101 ansible_ssh_private_key_file="/home/vagrant/.ssh/master.key" openshift_node_problem_detector_install=true openshift_schedulable=True openshift_node_labels="{'region':'master', 'node-role.kubernetes.io/master':'true'}"
node01.calvarado04.com openshift_ip=192.168.150.102 openshift_host=192.168.150.102 ansible_ssh_private_key_file="/home/vagrant/.ssh/node01.key" openshift_node_problem_detector_install=true openshift_schedulable=True openshift_node_labels="{'region':'infra', 'node-role.kubernetes.io/infra':'true'}"
node02.calvarado04.com openshift_ip=192.168.150.103 openshift_host=192.168.150.103 ansible_ssh_private_key_file="/home/vagrant/.ssh/node02.key" openshift_node_problem_detector_install=true openshift_schedulable=True openshift_node_labels="{'region':'compute', 'node-role.kubernetes.io/compute':'true'}"

[nfs]
master.calvarado04.com

Don't forget to add your SSL certificates.

Gallery

Cómo lograr ser un Red Hat Certified Engineer (RHCE) sin morir en el intento

Red Hat es mundialmente conocida por sus certificaciones, ya que sus exámenes distan mucho de las tradicionales pruebas de opción múltiple o incluso de los exámenes con preguntas abiertas, pues en Red Hat, los exámenes son totalmente prácticos, te ponen delante de una máquina, con una lista de actividades que se tienen que realizar sin conexión a internet, siendo monitoreado remotamente por dos cámaras web por el aplicador y teniendo pocos descansos (sin que estos detengan el tiempo disponible para realizar el intento de certificación). Por estas y otras razones (como el costo de sus cursos e intentos de examen), el peso específico que tienen estas certificaciones en la industria de las TI es bastante alto.

Hace poco comencé a recorrer el certification path que la empresa ofrece para llegar a ser algún día un Red Hat Certified Architect (RHCA), camino que requiere dos certificaciones base que son la Red Hat Certified System Administrator (RHCSA) y la Red Hat Certified Engineer (RHCE) más otras cinco certificaciones que pueden ser de muchas tecnologías, dependiendo más de gustos y necesidades laborales; así pues, en total son siete certificaciones para lograr ser un RHCA.

Pues bien, dado que ya tengo la RHCSA, hablaré de mi plan de ataque para obtener la RHCE al primer o segundo intento, pues, esta certificación tiene fama de ser muy pesada, poca gente reporta terminar todas las actividades en el tiempo disponible (4 horas) así como su nivel de dificultad, pues como dije, uno está solo contra la máquina, pudiéndose consultar solamente la documentación del sistema operativo y además siendo monitoreado todo el tiempo.

El temario básicamente es el siguiente, obviamente todo se basa en Red Hat Enterprise Linux 7 hasta el momento, aunque ya no tarda RHEL 8:

  • Configuración de servicios con Systemd
  • Control del proceso de arranque
  • Configurar redes IPv4
  • Configurar redes IPv6
  • Configuración Link Aggregation
  • Configuración de bridges por software
  • Administración de Firewalld
  • Etiquetado de puertos con SELinux
  • Configurar servidor DNS (unbound)
  • Solucionar problemas de DNS
  • Configurar servidor de correo
  • Conceptos iSCSI
  • Configurar servidor NFS
  • Configurar servidor SMB/CIFS
  • Administración e instalación de María DB
  • Queries RDBMS MySQL/Maria DB
  • Configurar servidor HTTPD Apache
  • Hosts virtuales y aplicaciones web con Apache
  • Shell scripting con Bash
  • Shell scripting avanzado, estructuras de control y condiciones
  • Uso de Docker containers

Realmente no son tópicos del otro mundo, son cosas que uno como sysadmin ha tenido que realizar al menos una vez durante la experiencia laboral, sin embargo, es menester estar bien preparado, con los comandos y los archivos de configuración frescos en la memoria y con la capacidad de solucionar los problemas más comunes de forma rápida porque el tiempo avanza velozmente y cuando menos te das cuenta, te quedan 30 minutos para terminar de responder.

Espero en entradas próximas ir desmenuzando este temario para que sea útil a más personas.

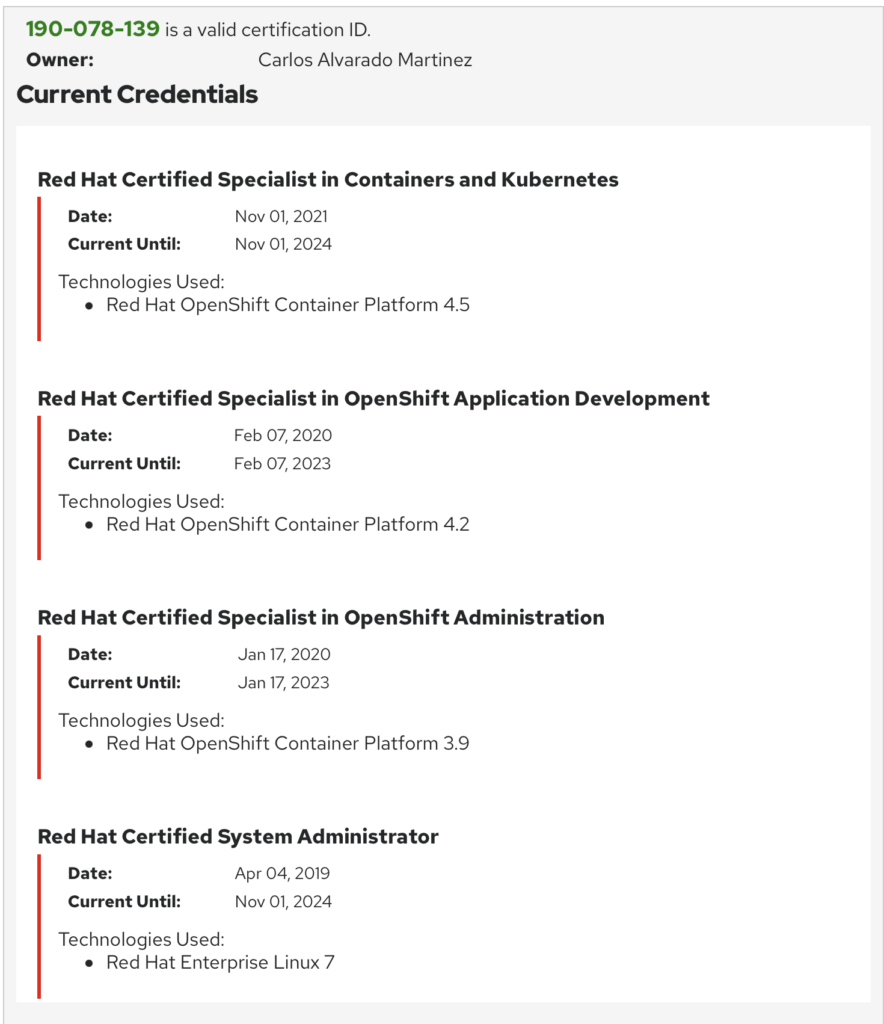
Actualmente cuento ya con cuatro certificaciones de Red Hat, a saber:

Katacoda, o cómo aprender sin aburrirse.

Sin duda, vivimos en tiempos donde la dinámica económica está cambiando en favor de los Servicios, donde la llamada Economía del Conocimiento es cada vez más palpable y está llegando a cada vez más personas en todo el mundo. Vivir en esta nueva realidad puede ser muy ventajoso, ya que por primera vez, se tiene un potencial de ascenso social no condicionado por el origen de la persona, sino por su talento y sus conocimientos.

Mucho se habla de cómo la educación formal, básica, media y superior han ayudado a millones de personas a mejorar su nivel de vida y esto es cierto, pero también hay que mencionar que esta educación no es suficiente, pues vivimos una tendencia de especialización de los puestos de trabajo, en detrimento de labores aburridas, repetitivas y poco gratificantes, lo cual, dicho sea de paso, me parece algo muy bueno.

En el mundo de la computación, he de decir, que las clases formales siempre me parecieron (y me parecen) muy aburridas, incluso las que trataban de los temas que más me gustaban, con excepción de las clases realmente teóricas (y donde la cátedra tradicional no puede ser sustituida), como estructuras de datos, cálculo, álgebra superior, matemáticas discretas, etc. Pero en el caso de las materias más prácticas, como las de programación, simplemente las encontré muy tediosas y creo que era por una simple razón: ver láminas o presentaciones con porciones de código sin realmente ejecutarlo uno mismo es como ver ruido de las televisiones de antaño, ruido que es descartado por el cerebro casi de inmediato. Claro, hasta el momento que intentas programar algo tú mismo, no sabes cómo hacerlo y recuerdas vagamente al profesor intentando enseñarte justamente eso.

Entonces,

¿Cómo adquirir estos conocimientos que ayudan a marcar la diferencia de una mejor forma?

No hay secreto: haciéndolo uno mismo.

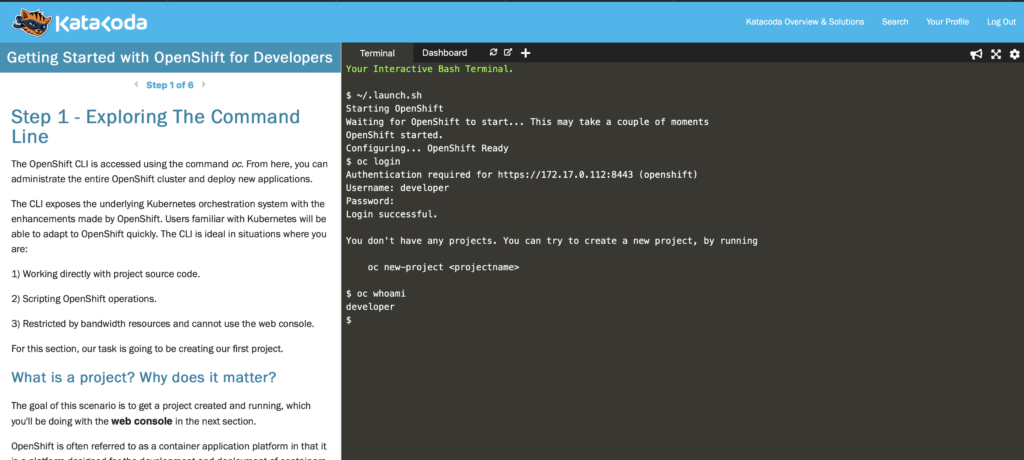
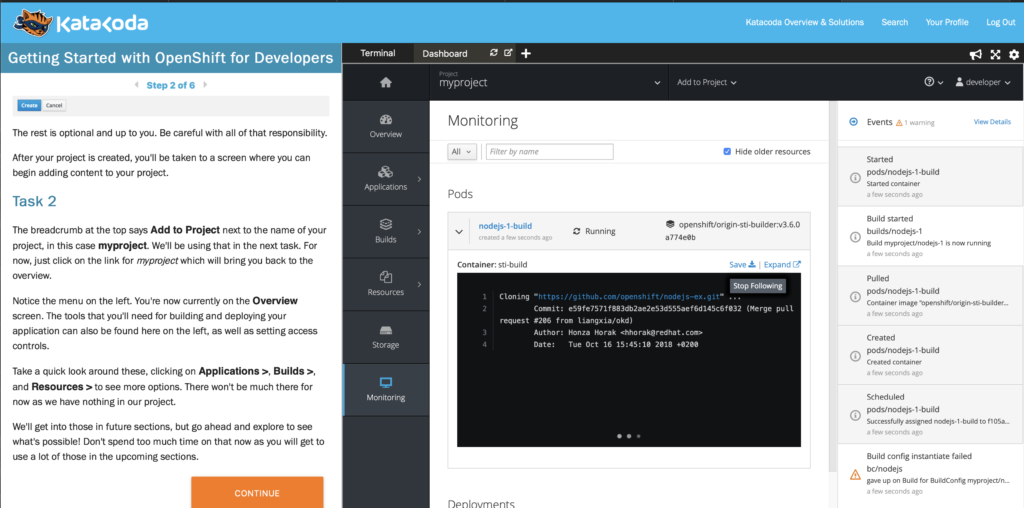
Aquí es donde entran portales como Katacoda, que proporcionan plataformas bastante interesantes, donde uno puede ir practicando directamente en una consola y en interfaces web embebidas, de modo que ya no hay pretexto para no aprender algo nuevo y de una forma divertida (para los frikis jaja)

Página de inicio de Katacoda

En particular, esta herramienta contiene muchos escenarios que sirven para ir aprendiendo sobre las nuevas tecnologías como Docker, Kubernetes, Jenkins, OpenShift, NodeJS, Cloud Platforms y hasta un poco de machine learning. Por supuesto, una gran parte del contenido está disponible de forma gratuita, esperando a que alguien quiera aprender haciendo.

Consola interactiva
Interfaz web embebida

https://www.katacoda.com

OpenShift Enterprise 3.11.69 on Intel NUC’s

Well, this is a very technical post and, in order to be useful for more people, I decided to write it in English.

Prerequisites

First of all, you should be able to have access to the OpenShift Enterprise repositories from Red Hat. Disclaimer: the current post is not related to CentOS based installations, also this post is not referring to OKD, MiniShift or even OpenShift on a single container (all-in-one), nope, this post is the technical review of OpenShift Enterprise 3.11 installed on a relatively small hardware.

Hardware

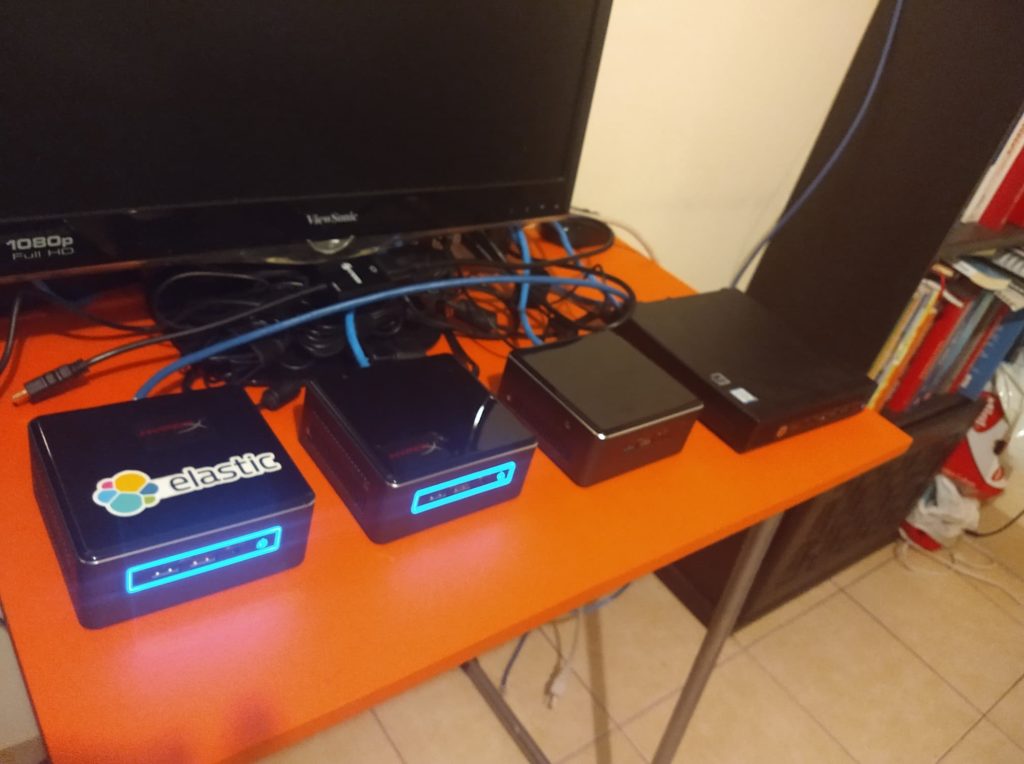
  • Intel NUC Core i7 quad core, 32 GB of RAM, 256 GB PCIe Flash, 750 GB Hard Disk.
  • Intel NUC Core i5 quad core, 16 GB of RAM, 256 GB PCIe Flash, 500 GB Hard Disk.
  • Intel NUC Core i3 quad core, 16 GB of RAM, 128 GB PCIe Flash, 500 GB Hard Disk.
  • HP MP 9, Intel Core i5 quad core, 16 GB of RAM, 256 SSD. This is the master node.
  • Lenovo Laptop with RHEL 7.6 as bastion host.
The nodes of my cluster.

Cluster components

  • 1 Master node
  • 3 Infra-compute nodes (infrastructure and computing nodes)
  • 3 GlusterFS nodes

As you can advice, there are not enough nodes to cover the proposed architecture, so, I'm proposing to share the node resources in order to deploy the infra-compute nodes and the glusterfs nodes together. Of course, this kind of deployment is not recommended by Red Hat, remember, this is only a cluster for learning purposes, never for production purposes.

Brief list of OpenShift services to deploy

  • Hawkular
  • Cassandra
  • Heapster
  • Elasticsearch
  • Fluentd
  • Kibana
  • Alert manager
  • Prometheus
  • Grafana
  • GlusterFS
  • Web Console
  • Catalog
  • Cluster console
  • Docker registry
  • OLM Operators
  • Problem detector
  • OC command line
  • Heketi
  • Master API
  • Internal Router
  • Scheduler
  • and more...

Operating system

Red Hat Enterprise Linux (RHEL) 7.6 up to date with the following repositories enabled:

rhel-7-fast-datapath-rpms
rhel-7-server-extras-rpms
rhel-7-server-optional-rpms
rhel-7-server-ansible-2.6-rpms
rhel-7-server-ose-3.11-rpms
rhel-7-server-rpms
rh-gluster-3-client-for-rhel-7-server-rpms
rh-gluster-3-for-rhel-7-server-rpms

You can enable them by performing the following commands (on RHEL 7.6):

subscription-manager repos --enable=rhel-7-fast-datapath-rpms
subscription-manager repos --enable=rhel-7-server-extras-rpms
subscription-manager repos --enable=rhel-7-server-optional-rpms
subscription-manager repos --enable=rhel-7-server-ansible-2.6-rpms 
subscription-manager repos --enable=rhel-7-server-ose-3.11-rpms
subscription-manager repos --enable=rhel-7-server-rpms
subscription-manager repos --enable=rh-gluster-3-client-for-rhel-7-server-rpms
subscription-manager repos --enable=rh-gluster-3-for-rhel-7-server-rpms

RPM packages required

The required RPMs on every node and the bastion host should be: wget, git, net-tools, bind-utils, yum-utils, firewalld, java-1.8.0-openjdk, bridge-utils, bash-completion, kexec-tools, sos, psacct, openshift-ansible, glusterfs-fuse, docker and skopeo.

$ sudo yum -y install wget git net-tools bind-utils yum-utils firewalld java-1.8.0-openjdk \ 
bridge-utils bash-completion kexec-tools sos psacct openshift-ansible glusterfs-fuse docker skopeo

For the GlusterFS nodes (in this case, the nodei7, nodei5 and nodei3 nodes, also install Heketi Server on the master node) you should to install also the Heketi packages and the GlusterFS server packages:

$ sudo yum -y install heketi* gluster*

DNS (configuration required)

You need a fully qualified domain name service capable to handle wildcards, unfortunately dnsmasq is not enough for that purpose, you should to configure bind (named) or directly handling this by a DNS on your own domain (I did the last scenario). You can check this guide if you want to deploy Bind on your bastion host: https://access.redhat.com/documentation/en-us/openshift_enterprise/2/html/deployment_guide/sect-configuring_bind_and_dns

Adding these entries on the /etc/hosts file is not sufficient to deploy successfully the cluster due to OpenShift generates automatically internal rules on the Kubernetes pods and it takes them from the DNS configuration.

  • master.calvarado04.com
  • nodei7.calvarado04.com
  • nodei5.calvarado04.com
  • nodei3.calvarado04.com
  • *.openshift.calvarado04.com <--- Wildcard, it must be making reference to the nodes where is deployed the router service (infra nodes).
  • cluster-openshift.calvarado04.com <--- Master node public name

Don't forget to change the name of your nodes in the same way, you can perform that by:

$ sudo hostnamectl set-hostname nodei7.calvarado04.com

$ hostname --fqdn
nodei7.calvarado04.com      

SSL Certificate (wildcard capable) for the OpenShift cluster

As you can see, If you want to install your own SSL certificate, that certificate must have wildcard capabilities, due to the basic SSL certificates won't work at all on OpenShift.

Your common name on your CSR request should be like this for the router certificate:

  • *.calvarado04.com for the master
  • *.openshift.calvarado04.com for the router subdomain (all the apps)

I added my certificate files on the bastion host on the directory /root/calvarado04.com, the files needed are:

  • /root/calvarado04.com/calvarado04.pem (that is the certificate file merged with the intermediate certificate and the root certificate, the certificate content at the top of the file).
  • /root/calvarado04.com/calvarado04.key with the private key generated when I generated the CSR file to obtain the SSL certificate.
  • /root/calvarado04.com/calvarado04.ca with the root certificate.
  • And the same for the router certificates (Openshift subdomain) on /root/calvarado04.com/openshift/

SELinux

Many people just disable SELinux on almost all new installation, this is not the case, SELinux is mandatory, it must be targered and enforcing on all nodes on the /etc/selinux/config file.

# This file controls the state of SELinux on the system.
# SELINUX= can take one of these three values:
#     enforcing - SELinux security policy is enforced.
#     permissive - SELinux prints warnings instead of enforcing.
#     disabled - No SELinux policy is loaded.
SELINUX=enforcing
# SELINUXTYPE= can take one of these three values:
#     targeted - Targeted processes are protected,
#     minimum - Modification of targeted policy. Only selected processes are protected.
#     mls - Multi Level Security protection.
SELINUXTYPE=targeted

Also please add the following rules to give permissions to the containers:

[root@bastion ~]# ansible nodes -a "setsebool -P virt_sandbox_use_fusefs on"

[root@bastion ~]# ansible nodes -a "setsebool -P virt_use_fusefs on"

Firewalld

OpenShift used to work with IPtables, but this is not recommended anymore and any new deployment should be using firewalld instead. To mask and disable iptables:

$ sudo systemctl stop iptables
$ sudo systemctl mask iptables

$ sudo yum -y install firewalld

$ sudo systemctl start firewalld.service
$ sudo systemctl status firewalld.service
$ sudo systemctl enable firewalld.service

Also add the GlusterFS Firewalld rules in order to allow the Gluster traffic on your nodes:

$ sudo firewall-cmd --zone=public --add-service=glusterfs

$ sudo firewall-cmd --zone=public --add-service=glusterfs --permanent

NetworkManager

OpenShift uses the NetworkManager capabilities, so, is required to have enabled NetworkManager on the network device, for instance, check the following configuration:

USE_PEERDNS=yes and NM_CONTROLLED=yes

[root@nodei7 ~]# cat /etc/sysconfig/network-scripts/ifcfg-eno1
TYPE="Ethernet"
PROXY_METHOD="none"
BROWSER_ONLY="no"
BOOTPROTO="dhcp"
DEFROUTE="yes"
IPV4_FAILURE_FATAL="no"
IPV6INIT="yes"
IPV6_AUTOCONF="yes"
IPV6_DEFROUTE="yes"
IPV6_FAILURE_FATAL="no"
IPV6_ADDR_GEN_MODE="stable-privacy"
NAME="eno1"
UUID="e57de406-5cc2-415a-90c7-5671a76dd3a2"
DEVICE="eno1"
ONBOOT="yes"
ZONE=public
USE_PEERDNS=yes
NM_CONTROLLED=yes

Restart the network and NetworkManager services:

$ sudo systemctl restart NetworkManager

$ sudo systemctl restart network

SSH keys

Ansible requires SSH keys to run the required tasks on each node, let's create a key and distribute it to every nodes:

[root@bastion ~]# ssh-keygen

[root@bastion ~]# for host in master.calvarado04.com \
    nodei7.calvarado04.com \ 
    nodei5.calvarado04.com \  
    nodei3.calvarado04.com; \ 
    do ssh-copy-id -i ~/.ssh/id_rsa.pub $host; \
    done

Ansible

The official OpenShift Enterprise 3.11.69 installation method is by running the OpenShift playbooks provided by the RPMs. The Ansible version must be 2.6.x not 2.7 due to issues with some tasks.

GlusterFS

This deployment will be using GlusterFS on the most basic installation using only GlusterFS without blocks and is not including the GlusterFS Registry cluster on Convergent mode. However, this method is allowing you to use dynamic provisioning of the PVC's (Persistent Volume Claims), this feature is quite fancy because is not longer needed to declare manually the PV's once the cluster is up and running.

Heketi configuration on the master node

OpenShift uses Heketi to generate the Gluster topology from the master node to the Gluster nodes and it perform that task by using a SSH connection. That's why you need to configure Heketi on the master host by adding the user and ssh key on /etc/heketi/heketi.json.

Also change any timeout entry to a numeric value (on _sshexec_comment and _kubeexec_comment), like "gluster_cli_timeout": 900.

    "_sshexec_comment": "SSH username and private key file information",
    "sshexec": {
      "keyfile": "/root/.ssh/id_rsa",
      "user": "root",
      "port": "22",
      "fstab": "/etc/fstab",
      "backup_lvm_metadata": false,
      "gluster_cli_timeout": 900
    },

Wait for Gluster pods issue

On my first attempt to deploy the cluster I was stuck on a step that were wait for Gluster pods, the counter was timed out and the playbook was marked as failure. I checked the pods on the nodes and I saw them, I checked its logs and its logs was not showing any error. Researching more I found that could be a bug on the wait_for_pods.yml deployment playbook, located on /usr/share/ansible/openshift-ansible/roles/openshift_storage_glusterfs/tasks, concretely a cast issue due to the playbook is comparing a string with an integer.

This is the original playbook:

---
- name: Wait for GlusterFS pods
  oc_obj:
    namespace: "{{ glusterfs_namespace }}"
    kind: pod
    state: list
    selector: "glusterfs={{ glusterfs_name }}-pod"
  register: glusterfs_pods_wait
  until:
  - "glusterfs_pods_wait.results.results[0]['items'] | count > 0"
  # There must be as many pods with 'Ready' staus  True as there are nodes expecting those pods
  - "glusterfs_pods_wait.results.results[0]['items'] | lib_utils_oo_collect(attribute='status.conditions') | lib_utils_oo_collect(attribute='status', filters={'type': 'Ready'}) | map('bool') | select | list | count == l_glusterfs_count | int"
  delay: 30
  retries: "{{ (glusterfs_timeout | int / 10) | int }}"
  vars:
    l_glusterfs_count: "{{ glusterfs_count | default(glusterfs_nodes | count ) }}"

And this is the fixed playbook:

---
- name: Wait for GlusterFS pods
  oc_obj:
    namespace: "{{ glusterfs_namespace }}"
    kind: pod
    state: list
    selector: "glusterfs={{ glusterfs_name }}-pod"
  register: glusterfs_pods_wait
  until:
  - "glusterfs_pods_wait.results.results[0]['items'] | count > 0"
  # There must be as many pods with 'Ready' staus  True as there are nodes expecting those pods
  - "glusterfs_pods_wait.results.results[0]['items'] | lib_utils_oo_collect(attribute='status.conditions') | lib_utils_oo_collect(attribute='status', filters={'type': 'Ready'}) | map('bool') | select | list | count == l_glusterfs_count | int"
  delay: 30
  retries: "{{ (glusterfs_timeout | int / 10) | int }}"
  vars:
    l_glusterfs_count: "{{ glusterfs_count | default(glusterfs_nodes | count ) }} | int"

Wipe the GlusterFS disks

In order to install successfully the GlusterFS cluster, please wipe all the data from the chosen disks (in this case, the three GlusterFS nodes have the disk on /dev/sda, but that it could be different in your configuration, be careful), there must be on RAW format only. Warning: you can lose all your data if you are not careful. You can perform this by:

[root@bastion ~]# ansible glusterfs -a "wipefs -a -f /dev/sda"

HTPasswd (users and passwords for OpenShift)

This is a really simple configuration on this topic, I'm using only htpasswd, I saved my users on /root/htpasswd.openshift on the bastion host. You should to try with LDAP, it's more secure and advanced. Go ahead and learn something 😉

If you want to use the same way just:

[root@bastion ~]# htpasswd -c /root/htpasswd.openshift luke
New password: 
Re-type new password: 
Adding password for user luke
[root@broker ~]# cat /root/htpasswd.openshift
luke:$apr1$SzuTxyhH$DlH976Tv2cDBccFZqJ3zf1

If you want to add more users, just omit the -c option:

[root@bastion ~]# htpasswd /root/htpasswd.openshift leia
New password: 
Re-type new password: 
Adding password for user leia
[root@bastion ~]# cat  /root/htpasswd.openshift
luke:$apr1$SzuTxyhH$DlH976Tv2cDBccFZqJ3zf1
leia:$apr1$UK2B49gy$qD/n3lKsoWXT0eRAMNoqm.

Run the installation playbooks

Once the package openshift-ansible is already installed on your bastion host and your SSH keys are already distributed on all your nodes, you can perform the installation of your OpenShift Cluster.

The happy path is quite simple:

  • Fill your inventory file located in /etc/ansible/hosts
  • Run the prerequisites playbook
  • Run the deployment cluster playbook
  • Check your installation
[root@bastion ~]# cd /usr/share/ansible/openshift-ansible/

[root@bastion openshift-ansible]# ansible-playbook playbooks/prerequisites.yml

[root@bastion openshift-ansible]# pwd
/usr/share/ansible/openshift-ansible

[root@bastion openshift-ansible]# ansible-playbook playbooks/deploy_cluster.yml

The inventory file: /etc/ansible/hosts

The most important file is this one, every configuration will be taken from this file and every failure will be coming from here almost all the times.

This is my inventory file (without users and passwords):

[OSEv3:vars]

timeout=120
ansible_user=root
ansible_become=no

openshift_deployment_type=openshift-enterprise
openshift_disable_check="disk_availability,memory_availability,docker_image_availability,package_version"

openshift_image_tag=v3.11.69
openshift_pkg_version=-3.11.69
openshift_release=3.11.69

openshift_node_groups=[{'name': 'node-config-master', 'labels': ['node-role.kubernetes.io/master=true','runtime=docker']}, {'name': 'node-config-infra', 'labels': ['node-role.kubernetes.io/infra=true','runtime=docker']}, {'name': 'node-config-infra-compute','labels': ['node-role.kubernetes.io/infra=true','node-role.kubernetes.io/compute=true','runtime=docker']}, {'name': 'node-config-compute', 'labels': ['node-role.kubernetes.io/compute=true','runtime=docker'], 'edits': [{ 'key': 'kubeletArguments.pods-per-core','value': ['20']}]}]

logrotate_scripts=[{"name": "syslog", "path": "/var/log/cron\n/var/log/maillog\n/var/log/messages\n/var/log/secure\n/var/log/spooler\n", "options": ["daily", "rotate 7","size 500M", "compress", "sharedscripts", "missingok"], "scripts": {"postrotate": "/bin/kill -HUP cat /var/run/syslogd.pid 2> /dev/null 2> /dev/null || true"}}]
openshift_enable_olm=true

oreg_url=registry.redhat.io/openshift3/ose-${component}:${version}
oreg_auth_user=email@something.com
oreg_auth_password=passw0rd

# Set this line to enable NFS
#openshift_enable_unsupported_configurations=True

openshift_additional_registry_credentials=[{'host':'registry.connect.redhat.com','user':'email@something.com','password':'passw0rd','test_image':'mongodb/enterprise-operator:0.3.2'}]
openshift_examples_modify_imagestreams=true
os_firewall_use_firewalld=True

openshift_master_api_port=443
openshift_master_console_port=443
openshift_master_default_subdomain=openshift.calvarado04.com
openshift_master_cluster_public_hostname=cluster-openshift.calvarado04.com
openshift_master_cluster_hostname=master.calvarado04.com

osm_cluster_network_cidr=10.1.0.0/16
openshift_portal_net=172.30.0.0/16
hostSubnetLength=9
os_sdn_network_plugin_name='redhat/openshift-ovs-subnet'

openshift_use_openshift_sdn=true
openshift_master_identity_providers=[{'name': 'htpasswd_auth', 'login': 'true', 'challenge': 'true', 'kind': 'HTPasswdPasswordIdentityProvider'}]
openshift_master_htpasswd_file=/root/htpasswd.openshift
openshift_cluster_monitoring_operator_install=true
openshift_enable_service_catalog=true
template_service_broker_install=true

openshift_template_service_broker_namespaces=['openshift']
ansible_service_broker_install=true
ansible_service_broker_local_registry_whitelist=['.*-apb$']
openshift_master_dynamic_provisioning_enabled=true

openshift_master_overwrite_named_certificates=true 
openshift_master_named_certificates=[{'certfile': '/root/calvarado04.com/calvarado04.pem', 'keyfile': '/root/calvarado04.com/calvarado04.key', 'names':  ['cluster-openshift.calvarado04.com'], 'cafile': '/root/calvarado04.com/calvarado04.ca' }]
openshift_hosted_router_certificate={'cafile': '/root/calvarado04.com/openshift/calvarado04.ca', 'certfile': '/root/calvarado04.com/openshift/calvarado04.pem', 'keyfile': '/root/calvarado04.com/openshift/calvarado04.key'} 

openshift_certificate_expiry_warning_days=20

openshift_hosted_router_replicas=3

openshift_hosted_registry_selector='node-role.kubernetes.io/infra=true'
openshift_hosted_registry_storage_volume_size=15Gi
openshift_hosted_registry_storage_kind=glusterfs
openshift_hosted_registry_replicas=3
openshift_hosted_registry_pullthrough=true
openshift_hosted_registry_acceptschema2=true
openshift_hosted_registry_enforcequota=true
openshift_hosted_registry_storage_volume_name=registry

openshift_metrics_install_metrics=true
openshift_metrics_storage_kind=dynamic
openshift_metrics_hawkular_nodeselector={"node-role.kubernetes.io/infra": "true"}
openshift_metrics_cassandra_nodeselector={"node-role.kubernetes.io/infra": "true"}
openshift_metrics_heapster_nodeselector={"node-role.kubernetes.io/infra": "true"}
openshift_metrics_storage_volume_size=15Gi
openshift_metrics_cassandra_pvc_storage_class_name="glusterfs-storage"
openshift_metrics_duration=1

openshift_prometheus_namespace=openshift-metrics
openshift_prometheus_node_selector={"node-role.kubernetes.io/infra":"true"}
openshift_prometheus_memory_requests=2Gi
openshift_prometheus_cpu_requests=750m
openshift_prometheus_memory_limit=2Gi
openshift_prometheus_cpu_limit=750m
openshift_prometheus_alertmanager_memory_requests=300Mi
openshift_prometheus_alertmanager_cpu_requests=200m
openshift_prometheus_alertmanager_memory_limit=300Mi
openshift_prometheus_alertmanager_cpu_limit=200m
openshift_prometheus_alertbuffer_memory_requests=300Mi
openshift_prometheus_alertbuffer_cpu_requests=200m
openshift_prometheus_alertbuffer_memory_limit=300Mi
openshift_prometheus_alertbuffer_cpu_limit=200m

openshift_logging_install_logging=true
openshift_logging_es_pvc_dynamic=true
openshift_logging_kibana_nodeselector={"node-role.kubernetes.io/infra": "true"}
openshift_logging_curator_nodeselector={"node-role.kubernetes.io/infra": "true"}
openshift_logging_es_nodeselector={"node-role.kubernetes.io/infra": "true"}
openshift_logging_es_pvc_size=15Gi
openshift_logging_es_pvc_storage_class_name="glusterfs-storage"
openshift_logging_es_memory_limit=3Gi
openshift_logging_es_cluster_size=1
openshift_logging_curator_default_days=1

openshift_storage_glusterfs_wipe=true
openshift_storage_glusterfs_heketi_wipe=true
openshift_storage_glusterfs_namespace=app-storage
openshift_storage_glusterfs_storageclass=true
openshift_storage_glusterfs_storageclass_default=true
openshift_storage_glusterfs_block_deploy=false   

openshift_storage_glusterfs_heketi_image=registry.access.redhat.com/rhgs3/rhgs-volmanager-rhel7
openshift_storage_glusterfs_image=registry.access.redhat.com/rhgs3/rhgs-server-rhel7
openshift_storage_glusterfs_block_image=registry.access.redhat.com/rhgs3/rhgs-gluster-block-prov-rhel7
openshift_storage_glusterfs_s3_image=registry.access.redhat.com/rhgs3/rhgs-gluster-s3-server-rhel7

openshift_storage_glusterfs_timeout=900

osm_default_node_selector='node-role.kubernetes.io/compute=true'

[OSEv3:children]
masters
etcd
nodes
glusterfs

[masters]
master.calvarado04.com

[etcd]
master.calvarado04.com

[nodes]
master.calvarado04.com openshift_node_group_name='node-config-master' openshift_node_problem_detector_install=true openshift_schedulable=True
nodei7.calvarado04.com openshift_node_group_name='node-config-infra-compute' openshift_node_problem_detector_install=true openshift_schedulable=True
nodei5.calvarado04.com openshift_node_group_name='node-config-infra-compute' openshift_node_problem_detector_install=true openshift_schedulable=True
nodei3.calvarado04.com openshift_node_group_name='node-config-infra-compute' openshift_node_problem_detector_install=true openshift_schedulable=True

[glusterfs]
nodei7.calvarado04.com glusterfs_ip=192.168.0.73 glusterfs_devices='[ "/dev/sda" ]'
nodei5.calvarado04.com glusterfs_ip=192.168.0.72 glusterfs_devices='[ "/dev/sda" ]'
nodei3.calvarado04.com glusterfs_ip=192.168.0.70 glusterfs_devices='[ "/dev/sda" ]'

Redeploy script (it's only working on my cluster)

I wrote a script to redeploy my cluster, I'm sharing with you:

[root@bastion ~]# cat redeployOpenShift.sh 
#!/bin/bash

cd /usr/share/ansible/openshift-ansible
ansible-playbook playbooks/adhoc/uninstall.yml
ansible-playbook -e "openshift_storage_glusterfs_wipe=true" playbooks/openshift-glusterfs/uninstall.yml
ansible nodes -a "rm -rf /etc/origin"
ansible nodes -a "rm -rf /var/lib/heketi /etc/glusterfs /var/lib/glusterd /var/log/glusterfs_devices /var/lib/gluster-block /var/log/gluster-block"
ansible glusterfs -a "yum -y reinstall gluster*"
ansible glusterfs -a "wipefs -a -f /dev/sda"
ansible nodes -a "shutdown -r now"
sleep 180
ansible glusterfs -a "systemctl restart glusterd"
ansible glusterfs -a "systemctl stop glusterd"
ansible nodes -a "setsebool -P virt_sandbox_use_fusefs on"
ansible nodes -a "setsebool -P virt_use_fusefs on"
ansible glusterfs -a "wipefs -a -f /dev/sda"
ansible-playbook playbooks/deploy_cluster.yml 
[root@bastion ~]# 

Final steps

Once the cluster will be up and running, just navigate to https://cluster-openshift.calvarado04.com the link it's only working for me 😉 and open the console.

To give cluster admin access to the desired user, enter to the master node and perform the following command:

[root@master ~]# oc whoami 
system:admin

[root@master ~]# oc adm policy add-cluster-role-to-user cluster-admin admin

[root@master ~]# oc adm policy add-cluster-role-to-user cluster-reader luke

[root@master ~]# oc get pods -o wide

[root@master ~]# oc get projects

[root@master ~]# oc rollout latest project-developer

[root@master ~]# oc logs 


Gallery

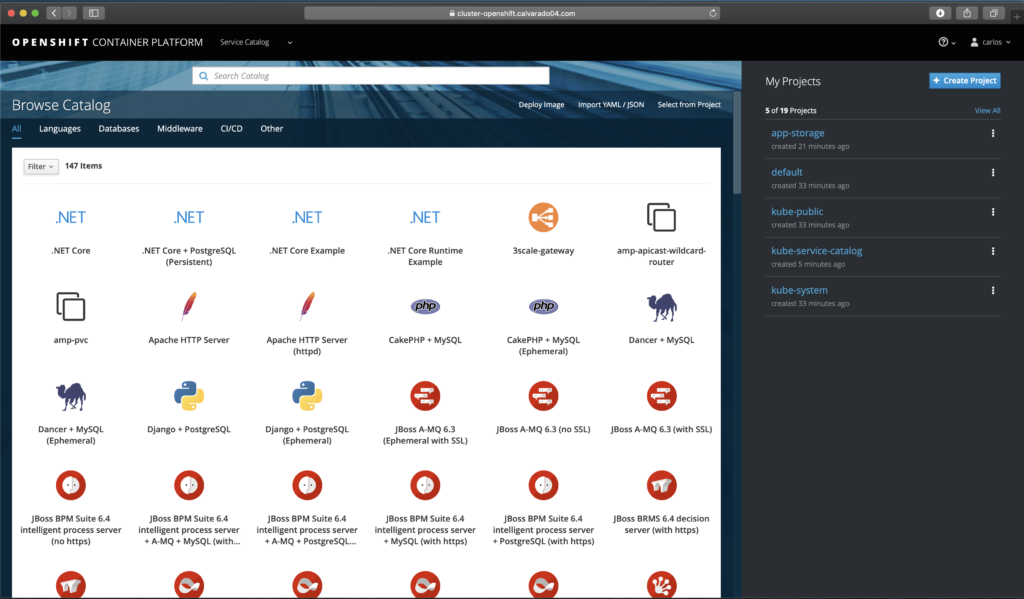
OpenShift Catalog
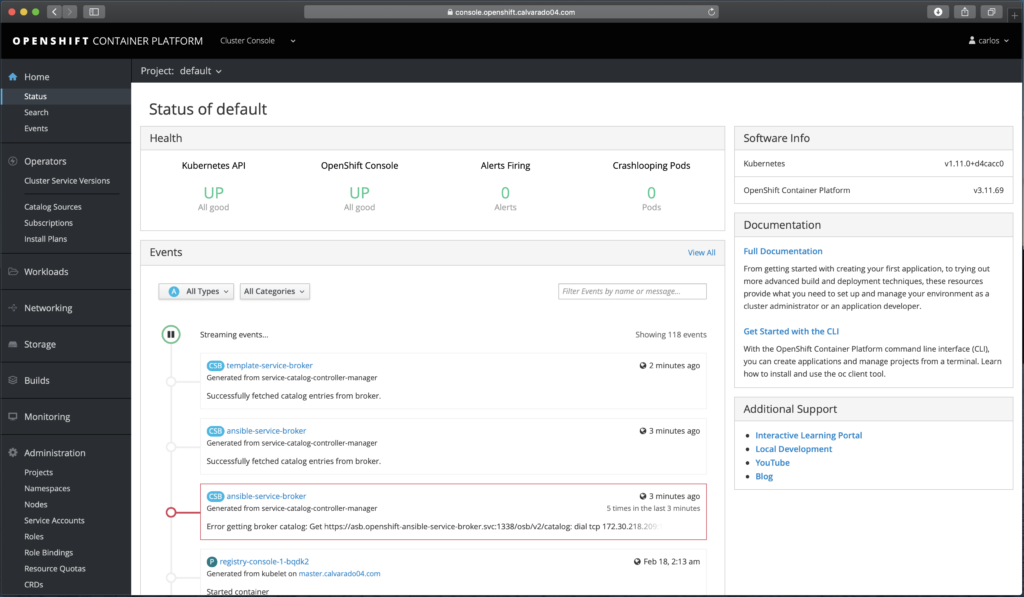
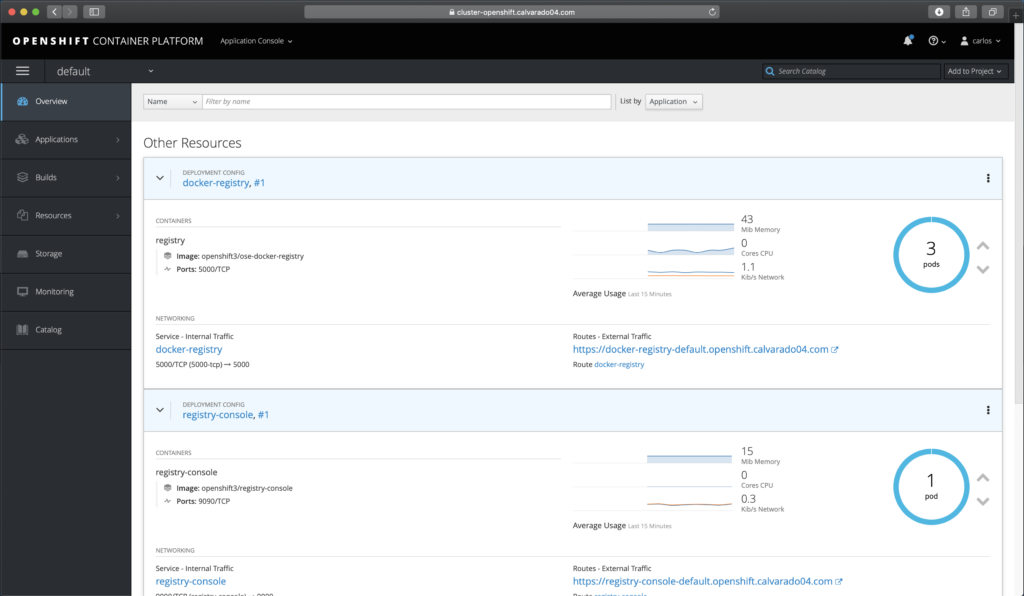
OpenShift Console
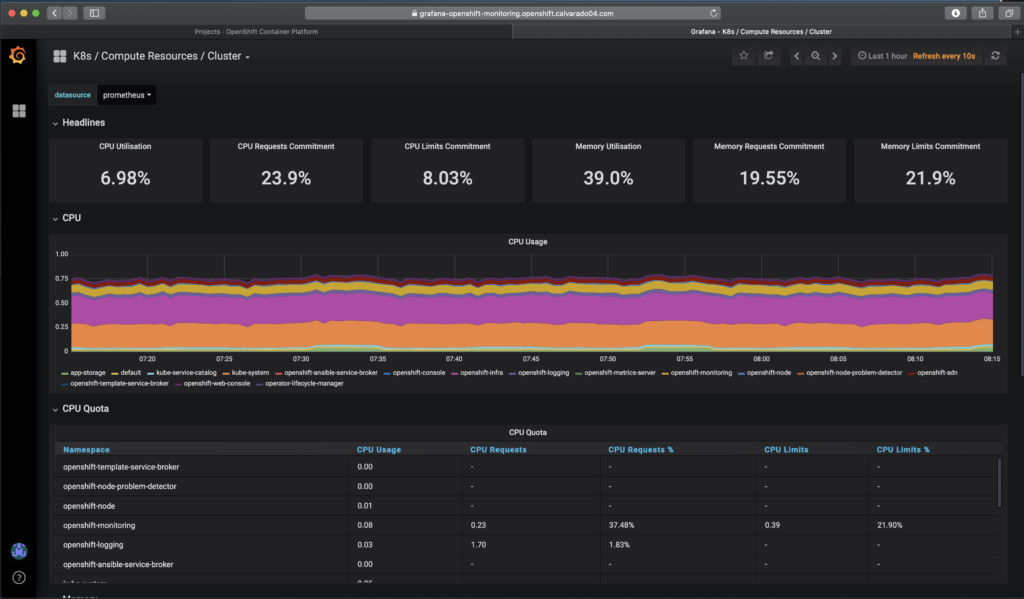
Grafana dashboards
Cluster Pods
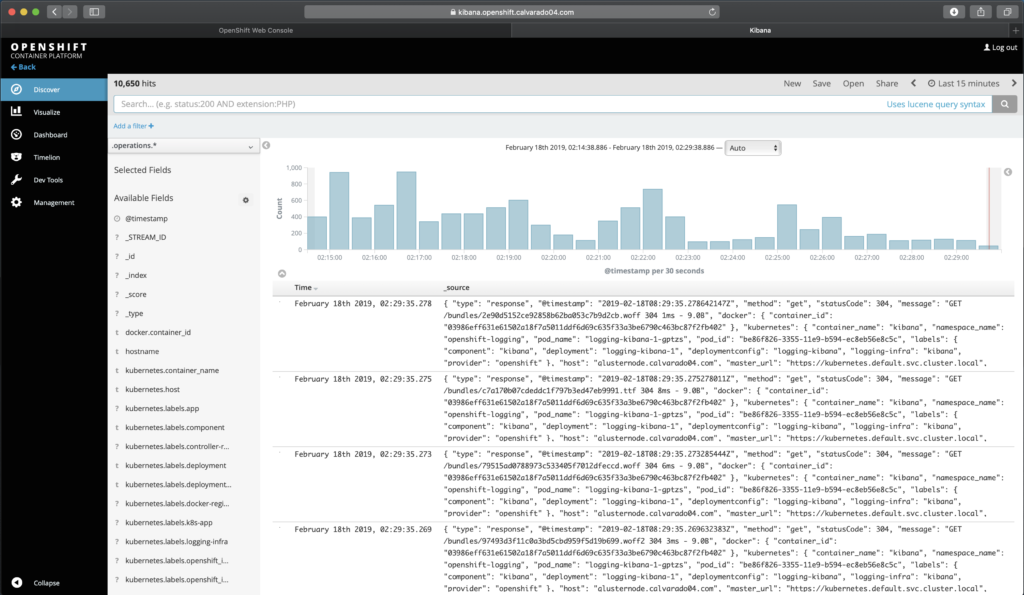
Kibana
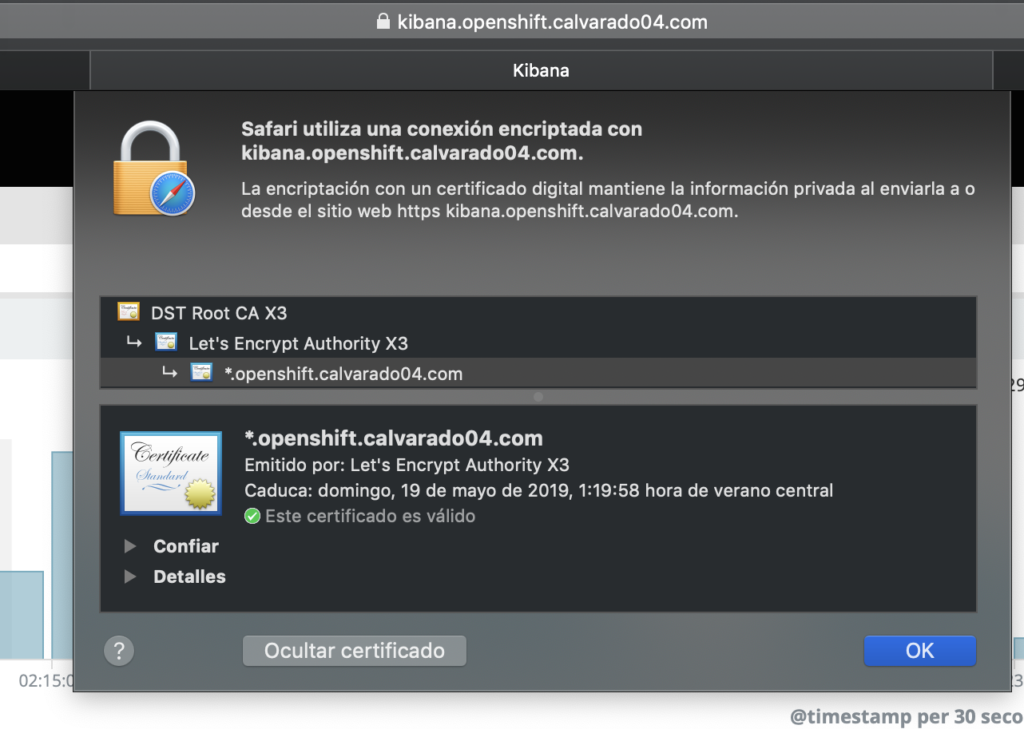
SSL Certificate

References